
Repair
Networking
Security
Cost
Projects
Contact
Help
About

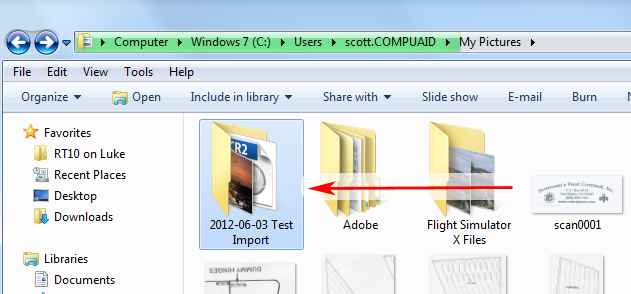
How to Import (copy) Photos to your Computer
One of the more common questions I get is how to copy photos to my computer, or how do I email photos. There are several ways this can be done but I choose to use the "Copy Pictures" feature in Windows 7. Main reason being is that no matter what type of software you have on your computer, this method will always work. Although this is written for Windows 7, this method can be adapted to Windows Vista and Windows XP.

Step 1)
Either insert your camera card or plug in your camera into a USB port on your computer. If you choose to plug in your camera you must set it for "plug-in" or "computer" mode. Please read the documentation that came with your camera.
Step 2)
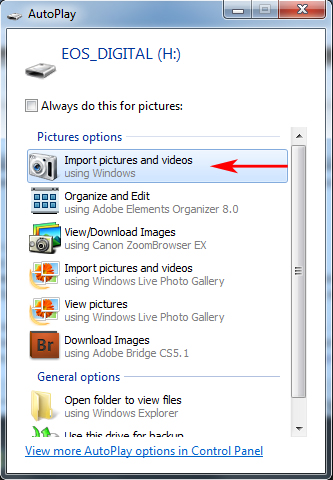
An "Autoplay" windows should then popup. Click on Import Pictures and Videos.
Step 3)
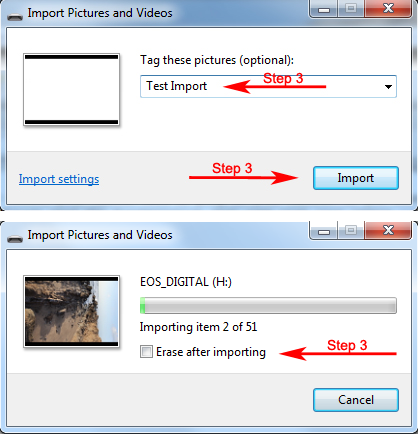
The Import Pictures and Videos windows will appear. It asks you to "Tag these pictures (optional)" and I would do so to make it easier to find the pictures once they are copied to your computer. Click the Import Button. Once the Import begins will see the "Erase after importing" checkbox. I would suggest that you do not use this just simply because you should verify that your pictures have actually been successfully been imported to your computer first (see the next step.)
Step 4)
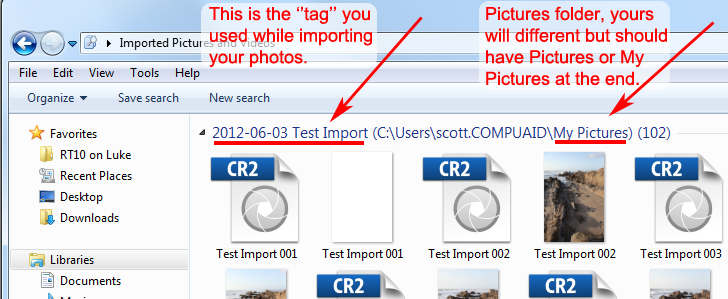
After the import is complete you should see a window popup with all your pictures. Take note of where it actually imported to. Notice that the file name has today’s date and the tag name you gave it in Step 3.
Step 5)
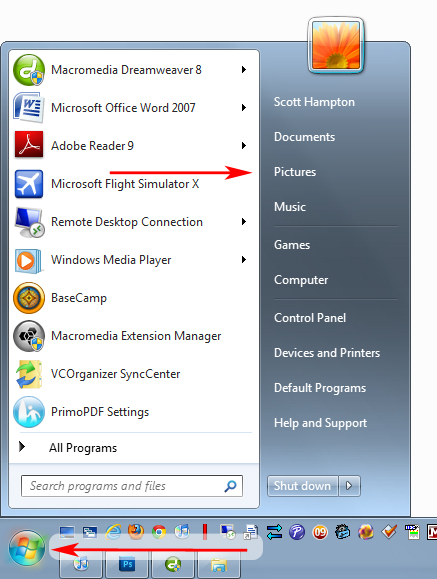
By default they should have imported into your Pictures folder. You can verify this by clicking on the Windows Start button (lower-left corner) and then click on Pictures.
Step 6)
You should see a new folder with today’s date and the tag you gave it in Step 3
Congratulations, you know how to import your pictures to your computer! Now that you successfully imported your pictures I would backup your computer before erasing them off of your camera card.
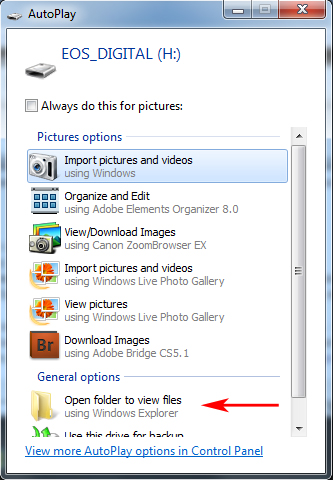
How to Erase Your Camera Card
The easiest way to erase your camera card is to use the erase feature on your camera. However, if you do not know how to do that then you can also do it on your computer.
Step 1)
Simply perform Step 1. The Autoplay window should popup and this time you will want to click on ''Open folder to view files''
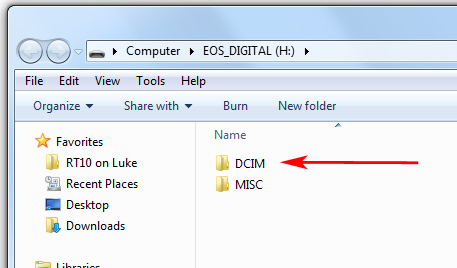
Step 2)
You should now see a folder called DCIM and double-click on it.
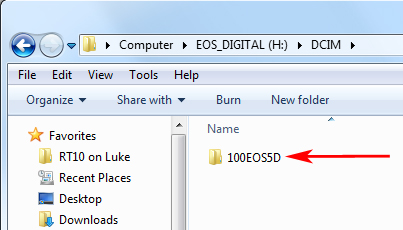
Step 3)
You will probably see another yellow folder (the name of the folder changes for different cameras.) so just double-click on it. Now you should be able to see your pictures
Step 4)
a.
Click on the Organize button located towards the upper-left corner of the current window.
b.
Click on Select All.
c.
Click on the Organize again.
d.
Click on Delete.
